10 Tips for Publishing and Promoting Your Blog Post

10 Tips for Publishing and Promoting Your Blog Post

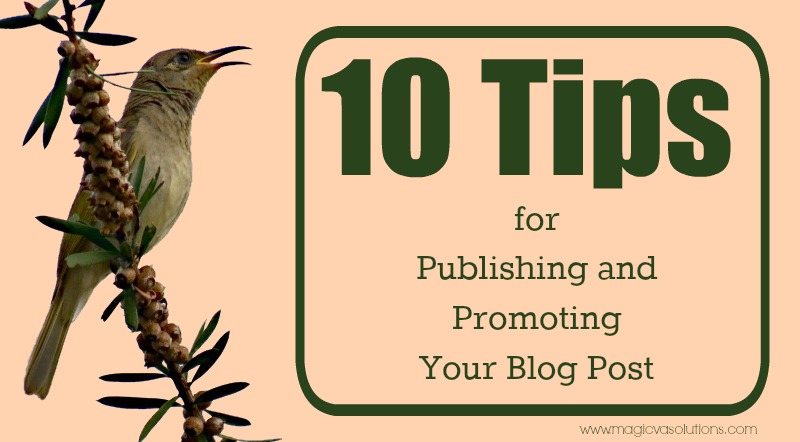
You might think that the hardest part of blogging for your small business is finding the inspiration. That may be so, but when your muse finally pays a visit, do you just type in the content, press ‘publish’, throw a couple of links out on Twitter, wipe your hands and be done with it? Well you could, but there are a few other things you could do to make the most of those words that often elude us.

  1. Oh look a pretty picture! – When you’re publishing a blog post, always include an image if possible. Stock photos are okay, but they can be even better if you jazz them up using photo editing software like Picmonkey. Have some fun with it!
  2. Make it easy for sharing – If you’ve got tidbits of tweetable information within your content why not make it easy for people to tweet your stuff with Click to Tweet?
  3. Ask a question – At the end of your blog post, ask a question to encourage your readers to comment. This is one I have often used in personal blogging and it really does give people a reason to engage.
  4. Tweetdeck for uploading images – When you’re promoting a new blog post on Twitter, don’t just send a link out, upload your blog post image using Tweetdeck. I say Tweetdeck because it uploads images directly to pic.twitter.com. That way, your image is immediately visible in your followers’ feeds and makes your tweet stand out in the crowd. Other programs show uploaded images simply as links. Also, if you’re planning ahead, you can schedule your tweet in Tweetdeck.
  5. Hashtags get you noticed – Don’t forget to use one or two hashtags when tweeting about your blog post. Choose something that is relevant to the post and to your audience such as, for this post: #bloggingtips #smallbusiness.
  6. Pin that tweet – Once you’ve tweeted a link to your blog post, with an uploaded image of course, pin that tweet to your Twitter profile, so that it’s the first thing that people see when they’re checking you out on Twitter.
  7. Promote on many different platforms – Twitter isn’t the only platform to promote your blog post obviously; you can share your link on Facebook, Google+, LinkedIn and a myriad of others. Why not pin that lovely image you created in Tip #1 on Pinterest?
  8. Promote your post two or three times in the first day – You can tweet your blog post link a few times in the first day, but not excessively and pepper your blog post tweets amongst other tweets so that you don’t seem repetitive if someone is viewing your Twitter profile. For other platforms, such as Facebook, Google+ and LinkedIn, I wouldn’t promote my blog more than the once as the streams don’t move as quickly on those platforms.
  9. Re-visit old blog posts – After some time has passed, like a few weeks or months, and if it is evergreen content, you can always promote your blog posts again on social media. Post something like “From the Archive: 10 Tips for Publishing and Promoting Your Blog Post…” or because my business name and tagline are about magic, I like to use: “Retro Magic: 10 Tips for…”
  10. Make use of that space after your name – Why not include a link to your latest blog post in your email signature?

Do you have anything to add to this list? If you found this list helpful, please pay it forward and share it around!

11 Tools I Use Everyday to Make Work Life Easier

Tools I Use Everyday to Make Work Life Easier
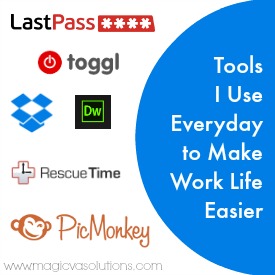
There are some tools that you have in your toolbox that you wonder how you would ever get along without them. For me, I can think of 11 off the top of my head:

Toggl – Because I need to track my time, I use the desktop version of this simple software. I can toggle on and off of tasks and at the end of the month when it comes time for invoicing, it spits out all my data in a CSV file that I can easily manipulate into reports for my clients.

PicMonkey – This website is one of the few where I’ve taken up the paid service, even though I could just use the free version, because I want to have all of the fonts and effects it has to offer. I use it every single day both personally and professionally. For my nature photography, it’s wonderful for magically adjusting an underexposed shot, and for my work, if I’m working with a stock photo that I want to add some text or change to suit the topic of my blog post, then it is easy and intuitive to do so.

RescueTime – Having to be connected to social media for my own business marketing means there is a possibility of getting caught in the time-suck that is Facebook/Twitter/Pinterest. RescueTime allows me to set goals for productivity and limits for distracting time. It tracks all the activities I perform on my computer, including email, software programs and internet usage, then it gives me a report at the end of the week letting me know how I did. I can choose which times of the day I wish to track, and with the paid version, you can block out certain websites during specified periods of time.

Dropbox – Gone are the days where it was necessary to send a file back and forth to a client and regularly use file sending services for larger files. Now I have file folders set up to share with my clients and I wonder how I ever got by without this service.

Dreamweaver – I do a lot of editing of web pages and when preparing HTML broadcasts for 1ShoppingCart, I find it much easier to whack the code into Dreamweaver and edit it from there. I pay a monthly subscription for this and consider it worth every penny.

FileZilla – When you edit web pages, you need a good FTP client to transfer the files across, and having recently changed from Core FTP to Filezilla when I bought a new laptop, so far I’m happy with Filezilla. I like that even though it disconnects you from the server after a period of inactivity, it is almost seamless to reinstate the connection.

LastPass I’ve blogged about this software before, but it is still the bee’s knees in my eyes. It’s a great way to keep track of all your passwords in the one place while still using hard to crack passwords on all the websites you access.

Notepad – Often when dealing with text brought in from word and other sources, there is rich text formatting that is attached to it that makes it look inconsistent or might mess up the HTML code on a broadcast, so I often will copy and paste the text into Notepad to remove any formatting before copying the text into a blog post or email broadcast.

TweetDeck – When I do need to get on social media, specifically Twitter, I like to use Tweetdeck, because I can manage multiple accounts and see everything in columns down the page. I can follow hashtags, search on keywords and I can schedule tweets, and because Tweetdeck uploads images to pic.twitter.com, it means when I include a photo with my tweet, it shows immediately in my followers’ feeds instead of showing as a link that people have to click before being able to view.

Multiple browsers – I have a couple of Google accounts: one for my personal blog and one for my VA business. There are also other websites where I have two profiles and I can manage this easily by using more than one browser. For instance, if I want to access my Google+ account, I use Google Chrome and if I want to access my professional one, I use Mozilla Firefox. I don’t have to log in and out and I just make sure that my default browser is for the profile I use most. It is also great to test how an HTML page is looking in more than just one browser.

Excel – I have a confession to make: when it comes to keeping track of my to-do list, after having tried many project management/to-do list type software programs, I find that you can’t go wrong with a simple Excel spreadsheet. I have tasks that rollover each day/month/week and a prioritisation and sort pull them up for me every morning, where I write the most important tasks on *gasp* a paper notebook that sits on my desk – it works for me!

There’s my list. What’s on your list of workplace tools that you wouldn’t want to live without?

4 Reasons Why Solopreneurs Need to Document Their Procedures

When I worked in a corporate office, I was asked to be a peer auditor for our quality system. I must admit that it was not my favourite job, my eyes would glaze over at the mere thought of it.

Back then, I didn’t appreciate the value of having things documented so that if ever someone had to step into your shoes on short notice, it was all there in black and white, and the person had something to refer to that would help them to perform the required duties in your absence.

Now that I run my own small business, I could be lulled into thinking, “I am a solopreneur, no one else but me does my job, why do I need to document what I do?”

Document Your ProceduresWell, there are some very good reasons to document what you do as a small business owner:

  1. What if, heaven forbid, something were to happen to you? Would anyone know how to figure out your accounts, what was owed to you and what you owed others? Would they know who your clients were and whom to notify in the event of an emergency that prevents you from completing the work you were engaged to do?
  2. Have you ever done something once, and then time lapses and you go to do it again, realising that you forgot how you completed the task the first time?
  3. What about if your business ramps up and you need to take on staff? If you have your processes and procedures documented, it is easier to provide your new staff member with a document they can read over in the first instance and then address any questions as they come up. This would be particularly useful if you are required to take on staff on a seasonal basis.
  4. Having your processes and procedures documented gives you the opportunity to highlight inefficiencies, to tweak your processes so that you can optimise your time and produce a superior product or service.

Have you got your documentation up to date and does someone know where you keep it? If not, why not start today with one procedure and go from there?

8 Things Small Business Owners Can Aim to Achieve in 2014

Thinking about 2014It’s a brand new year and with the turn of the calendar page comes a renewed motivation to make THIS the year that you propel your small business to dizzying heights.

A bit of a lofty goal, but you know what they say, right?

The journey of a thousand miles begins with one step. ~Lao Tzu

Here are some things you could aim to accomplish in 2014 to help you on your way:

1. Establish/Improve Your Web Presence

If you don’t have an online presence yet, create a website. It’s not as hard as you might think, with tools such as WordPress and Weebly to make it easier.

For businesses with a website already established: upgrade to a premium template and/or hire a professional graphic designer to freshen up your logo/header graphic.

2. Build Your List

You’ve got a website, but you aren’t doing anything to build your list of contacts. You will have heard it before, but building your list is something you should be doing from the beginning. If you have a list of people who like hearing from you, you have a list of potential customers! You will need to set up software on your website to capture your prospects’ email addresses. Some popular ones are MailChimp, Aweber, GetResponse and 1ShoppingCart.

If you’ve already established a way to capture your leads, then now’s the time to focus on list-building activities. I’m doing Nathalie Lussier’s 30-day List Building Challenge; you might want to do that too. It doesn’t cost a thing and so far I’m loving how it’s all laid out in actionable chunks.

3. Blog for Your Business

If you haven’t already, start blogging for your business. New content to your website on a regular basis makes Google happy and when Google is happy it sends more traffic your way. More traffic means more people who might want to buy your products or services.

For established business bloggers, you could join a blogging challenge or create an editorial calendar and stick to it. Brainstorm content ideas and always have a notebook to write down ideas when inspiration strikes. Tip: Always scrambling for a pen and paper? Evernote is a tool that you can use to capture ideas when you’re on your phone or tablet.

4. Publish an eNewsletter

Start publishing an eNewsletter. Most list management software makes pre-made templates available to you that you can use to plug your content into and…Presto! You have a newsletter to send to your contacts.

5. Create Some Products

If you are a service-oriented business, such as a coach or consultant, then you have a wealth of knowledge that simply needs to be shared! People might not be ready to engage your services, but an e-book might give them a taste of what you have to offer and gives you a stream of passive income.

6. Get Social

Social media is a way of connecting with your potential customers and it’s free. Start with two or three: Facebook, Twitter and Google+. The key here is to keep your accounts active. A presence without any activity isn’t doing you any good; it’s not a set-it-and-forget-it kind of thing. The bonus is that you might learn something from what others share, you could make some great connections and you could have some fun. Be yourself and remember that it is “social” media not “sales” media. Make sure your non-sales-oriented content appears more than your self-promotion.

7. Take It Offline

You hear everywhere that offline business networking is a very effective way of gaining clients. People like face-to-face interaction and are far more likely to remember someone they’ve met at a business function when they’re looking to buy a product or service. The people you meet in person could also be a great source of referrals.

8. Make Use of Video

It doesn’t have to be a video that goes viral, but a simple introductory video on your website can go a long way to increasing your traffic and sales/clients. Google owns YouTube, so you can bet that websites with video rank higher than those without.

Having written that list, there are some things on there that I need to work on; there is always something I could be doing to make things better. Here’s my plan for 2014.

  • Update my website template to something sleeker.
  • Continue with Nathalie’s List Building Challenge.
  • Blog, blog, blog!
  • Consistently publish my newsletter.
  • I’m not ready to create an e-book, but I do want to create a free offer to encourage people to sign-up to my newsletter.
  • Oops, I’m guilty of being less than active on a few of my social media channels, so have got to fix that!
  • I can be a bit of a wallflower at business functions, so I need to put myself out there and join a business networking group in my area.
  • Video? That’s a scary prospect, but sometimes you just have to step out of your comfort zone, and for me, this activity definitely fits that description! Hmmm, maybe later in the year after I’ve lost a bit of these extra few kilos from too much pumpkin pie at Christmas.

So there’s a few things to strive for this year, sound good?

Of course, if you need any help with implementing some of the above, email me. We can chat about what you want to achieve for your business and how I can support you in your efforts.

Android Users: How to Post from Instagram to your Facebook Page

UPDATE: In Instagram, you can choose to post to a page instead of your profile. You just need to go to your profile and tap the three horizontals dots in the top right. Scroll down and tap ‘Linked Accounts’, then select ‘Facebook’. If you haven’t already, enter your Facebook login information. By default, your Instagram account will link to your personal Facebook Timeline. To link to a Page instead, tap ‘Facebook’ again and choose a Page that you manage below ‘Share to’.

Well I am just a little bit stoked by something I learned today!

A fellow member of a Facebook blogging group* shared a tip about a site that allows you to set up sharing from Instagram to your Facebook Page – instead of just to your personal profile. It was a real gem, and so I’m paying it forward and sharing it with you!

Android Users: How to Post from Instagram to your Facebook Page

This is great for business owners who want to keep the content on their Facebook pages fresh, but are hindered by the fact that certain apps, like Instagram, only allow Android users to post to their personal profiles and not their Facebook pages.

The site is called IFTTT (pronounced ‘ift’ as in ‘gift’), which is an acronym for If This, Then That.

I’m sure there are plenty of uses for it, but I’ll concentrate on the task at hand: posting from Instagram to a Facebook Page.

Here’s what you need to do to set it up:

  1. Join IFTTT; it doesn’t cost anything.
  2. Click on the Create Recipe button.
  3. Click on ‘this‘ in ifthisthenthat.
  4. Choose a Trigger Channel; in this case it would be Instagram.
    Instagram
  5. Choose a Trigger; I would choose ‘New photo by you tagged’ so that I could choose which photos are posted to my Facebook Page.
    IFTTT Trigger screenshot
  6. Authorise IFTTT to access your Instagram account.
  7. Enter the tag you want to use that will trigger posting to your Facebook Page. I used #MagicVA.
  8. Then you click on the ‘that‘ in ifthisthenthat.
  9. Choose the Action Channel; in this case it would be Facebook Pages.
    Facebook Pages Icon
  10. Authorise IFTTT to access your Facebook Account and choose your page.
  11. Choose an Action: Upload a photo from URL
    IFTTT Action screenshot
  12. In the Photo URL field, if it’s not already there, click on the plus sign, choose Image Source URL and click on Add Ingredient.
  13. In the Message field, delete the default values, click on the plus sign, choose Photo Caption Without Tag and click on Add Ingredient.
    IFTTT Action Options Screenshot
  14. Click on Create Action.
  15. Click on Create Recipe.

This is what you need to do to use it:

  1. Take a photo with Instagram.
  2. Make it pretty and enter your caption.
  3. Make sure you add your chosen hashtag at the end of your caption; remember that mine was #MagicVA.
  4. Share it. You don’t need to select Facebook in the sharing options, because IFTTT does it behind the scenes.
  5. Go check out your page after 15 minutes and voilà, your photo and caption should be there.

Now that you’ve created your first IFTTT recipe, try it on other channels. For instance I’ve created a recipe that will allow me to post only certain hashtagged tweets to my Facebook Page. Cool eh?!

Consider this an IFTTT from me to you! :-)

If you like this post, consider pinning it for later reference. Here’s a Pinterest-friendly image:

Android Users: How to Post from Instagram to your Facebook Page

Note: IFTTT will check for triggers once every 15 minutes, so it won’t turn up if you test it immediately after creating the recipe. Also, this recipe only works on new photos, so don’t try to re-share an existing Instagram photo, because that won’t work.

* Thanks to Zoey from The Shake for the excellent tip!

The Easy Way to Tighten Up Your Password Security

Every now and then you receive a mystery email from a friend. It includes just a link, and you notice it has been sent to everyone in that person’s address book. Or you might receive a direct message on Twitter saying, “Hey, someone’s saying bad things about you”, and it includes a link to a dodgy website.

When this happens, you know your friend’s account has been hacked. I know of someone who had his WordPress site hacked. The home page had been changed to a blank page with a simple message that said, “you’ve been hacked.”

Impact of Account Hacking

The impact of these nuisance cyber attacks varies from having to change a password and be done with it, or having to reinstall your website from back-up, if you have a back-up that is. Imagine if you didn’t! It wastes your time and it can waste your money.

[pinit]
Brass Padlock - The Easy Way to Tighten Up Your Password Security
Click to Tweet!

How to Avoid Being Hacked

There’s no foolproof way to avoid being hacked, but making it more difficult for the bad guys to access your account, helps. Making your password hard to crack is one way of doing that. Of course, people like to have passwords that they can remember so they use names, dictionary words or worse, “password” or “123456”. Passwords like this can be cracked in a matter of minutes.

But I Only Have a Small Website

Don’t think that just because you are a small business owner with small website, that you won’t be a target for a hacker. The hacker is indiscriminate, because it is not someone physically sitting at the computer deciding where they might target. Rather, it is a computer program the hacker has created to trawl the internet looking for ways in.

Malicious Code May Have Been Installed

Once the security of your site has been compromised, there’s no telling what malicious code could have been installed. It may install a back-door so that the hacker can gain access at a later date – after you’ve worked hard to restore your content.
Use Complicated Passwords

It is important to use complicated passwords that don’t include dictionary words, names or simple number combinations. Your password should be a combination of numbers and letters in both uppercase and lowercase. It should include characters such as @#$%^&* and it should be at least 8 characters long – the longer the better.

You might be wondering, “How will I ever remember that?” Well, you don’t have to; there are password management programs out there that will help you to keep track of it all.

LastPass

I’ve been trying out the free version of LastPass for a little while, and so far I’m finding it to be very helpful:

  • I just downloaded the add-on, I created one master password for my account and it searched my browser for all my saved passwords and put them in a ‘vault’ of passwords on the LastPass server. These passwords are encrypted/decrypted locally on my own computer, so the folks at LastPass never know what they are. Only the encrypted password is synced with LastPass’s server.
  • It alerted me to all the insecure passwords I had. Not only did I have a lot of duplicate passwords – one password that I used on many different sites – but I also had passwords in there for sites where I didn’t even remember having an account!
  • When I’m signing up for new sites, I can easily generate strong passwords and store them on LastPass.

What If LastPass Isn’t Accessible?

I was concerned that if LastPass’s servers were down that I wouldn’t be able to access my password, but LastPass said on their website:

When you login to the Internet Explorer, Firefox, Google Chrome, Safari, or Opera plug-in, LastPass downloads and stores your encrypted data. If we’re offline you’re still able to login in offline mode, but you’ll be unable to add or change sites while LastPass is off the air. You still will be able to export your accounts if you’re running the plug-in.

What About Access from Another Computer?

Then I was wondering what would happen if my computer went down and I had to access my accounts from a different computer. Apparently if you’re on a friend’s computer or traveling, you can access your sites from https://lastpass.com/ at any time.

What About Mobile Phone Access?

What about access to my accounts through my mobile phone? You can upgrade to premium and install and sync LastPass on all your devices.

Does LastPass ‘Make’ Me Change Passwords?

Being a Virtual Assistant, I have need to access accounts on behalf of my clients. I didn’t want this software to ‘make’ me change passwords that were not mine to change. LastPass gives me complete control over which passwords I change and if I want to, I can set it to prompt me to change my passwords periodically, which is also ideal.

I’m a Kid with a New Toy

All in all, I’m really pleased with LastPass; I’m like a kid with a new toy. I’m changing all my passwords to really complicated ones, and in my spare time I’m organising my passwords into groups within the vault and weeding out accounts that I no longer wish to access.

So do you think you might tighten up your password security as a result of reading this? Do you recommend any other password management programs?

If you found this information useful, please share it on Twitter, Facebook, Google+ or a social media channel of your choice.